
So to start here is a bit of back story. Our university (Bournemouth) has partnered up with MPC to give us some R&D assignments for our master class which they will judge and give feed back at the end of the project. We had the choice between creating some kind of terrain generation or animation application or if you’re truly hardcore to implement one of a selection of mesh deforming papers from SIGGRAPH. I (being the hardcore of hardcore) decided that my brain clearly isn’t working hard enough at the moment and have chosen the latter. so here is a quick introduction to laplacian mesh editing and what I understand at the moment. Also theres a demo!!! *screams*
So laplacian mesh editing is a form of deformation in which the user will paint weights to a mesh of their choosing and from the manipulation of these weights can magically deform the object before your eyes. But how does one do that you might say? Good question! Well firstly we have to represent our geometry in a different way. You’re probably used to using relative coordinates to represent points in a mesh i.e. Vec3(1,4,5). Well for laplacian mesh editing we represent the point in relation to its neighbouring points.This is called the implicit representation and goes a little like this…

So here we have a square made from 4 points (mind blowing!). To find the location of V0 from the other points we can use half the sum of V1 and V3 then add this unknown vector d0 (delta). We can calculate this unknown by simply rearranging the equation just like in Fig 1. Now lets get a bit more crazy and represent all these points in implicit matrix form.
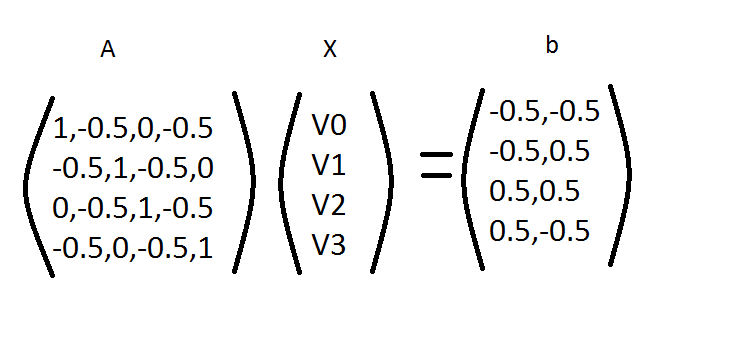
From this form you are now ready to create some deformation! You do this by adding these things called “handles” or “anchors” to our matrix. Say if we want V0 and V2 to be our handles this is how it would look.

Now say if we change the position of V0 and V2 in our delta matrix (denoted b in Fig 3) and then solve for x, this will give use different points because deformation has occurred (Huzzuh!). But you may be thinking to yourself, “How in the world do I solve this? These are not square matrices!”. Another great question! Well here is how…

Now we have the basis of our laplacian mesh editing! You can deform simple shapes to your hearts desire! But this is by no means a complete. The way we create our matrix A or our “laplace matrix” only currently works for very uniform geometry. For any complicated shapes we will have to calculate this another way. Sadly I dont know that yet 😦 but keep updated with my posts and one day… just maybe… I will!
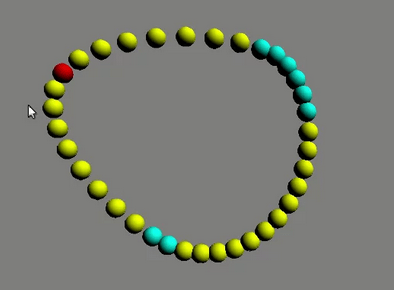
Anyway here’s a pretty demo!

Hello Declan. Would you mind sharing those papers you read for this project? Thanks
LikeLike
Hi Noah. Of course, I have added a reference accordingly. Also there is a finished version and source code in my portfolio page which you may find useful. Cheers! 🙂
LikeLike
Loved reeading this thank you
LikeLike